Volume 90%
Press shift question mark to access a list of keyboard shortcuts
Keyboard Shortcuts
Play/PauseSPACE
Increase Volume
Decrease Volume
Seek Forward
Seek Backward
Captions On/Offc
Fullscreen/Exit Fullscreenf
Mute/Unmutem
Seek %0-9
00:00
00:00
00:00
 

Chapters

Transcript


[MUSIC PLAYING]

OLIVER ADUNKA: This is a video on what's called a lateral graft tympanoplasty. It's a tympanoplasty that's usually performed when the remainder eardrum is very scarred, has a lot of scar tissue and when the typical underlay graft tympanoplasty would not have a high success rate.

So this is a patient who has a subtotal perforation of a tympanic membrane. What we see here is the postauricular incision. So we basically cut the tissues behind the ear. And we dissect the soft tissues, which you can see here, with the bovie. And what we then do, we find the temporalis fascia. And we remove the loose areolar tissue that sits right over the actual fascia.

We free up the tissue, which we can see now, which is done with the Freer. And we isolate the actual fascia sitting over the temporalis muscle. And then we undermine this. And as you can see now, we lift up the fascia, and we harvest the graft.

And this graft will be used to replace the eardrum. As opposed to a medial graft tympanoplasty, this graft will remain. It will vascularize and will represent the new eardrum, hopefully for the rest of the patient's life.

What we can see here, we removed muscle, remainder of temporalis muscle that sits within the graft. We make it as thin as possible. And we dry that graft on the back table. We palpate the mastoid tip, insert two Weitlaner retractors-- self-retainers. And then we remove what was called the Palva flap. So it's a periosteal flap essentially from posterior. We basically remove this from the mastoid.

Then we enter the ear canal. We can see here we removed the tissues of the external auditory canal from the tympanomastoid suture line. And we enter the ear canal. We make a cut. And we isolate what's called the vascular strip. So it's tissue that vascularized in the posterior superior aspect of the ear canal.

And we remove that from the tympanomastoid suture line, which we see cutting right now. And then we back-elevate that tissue over, all the way until we encounter the squamous suture line, which can be seen right here.

That tissue is rotated out. We usually secure via a Penrose drain, which can be seen year. It's a 1/4-inch Penrose drain. We bring that tissue out. And again, we secure this vascular strip flap, which can then be secured lateral and at the end of the case brought back in to provide squamous tissue for the ear canal.

The next step really entails finding that bony cartilaginous junction of the anterior ear canal. It's a step to remove the soft tissues of the anterior ear canal so what we're left with eventually is an ear canal where only the bony ear canal is left.

We can see laterally here. We found the medial aspect of the tragal cartilage. We get down to the bone, and we carefully remove that anterior canal skin, all the way down to the annulus. So this is the step here.

It's typically quite fibrous laterally. So we have to go slowly here. But as we move more medially, this becomes more easy to dissect. Now we're all the way down to the annulus, and we see, usually we use a sweeping motion to cut that tissue, again right lateral to the annulus of the tympanic membrane.

That takes some patience usually, because we can see here that we're right lateral to the tympanic membrane. We can also see that the round knife, the instruments we're using right now, really disappears, and it goes to show us the bony isthmus of the external auditory canal.

This is the ear canal skin. This is the tissue we have obtained. We put it on the back table. We usually keep that moist. We spread it out here. We can see that's the periosteal side, and that's the squamous side. You can clearly see the skin. So we make sure we keep that moist. We can see the hole, the drum here, the perforation.

And the next step really is to enlarge the ear canal. And I always maintain that this is probably the most important part of the surgery is also a hard part of the surgery, to really enlarge the ear canal, to avoid really getting into the glenoid fossa, which is anterior to the ear canal.

So really just making sure you can visualize the color change which is associated with such a breach. And we sort of identify the anterior border of that dissection and carefully drill. Typically, extensive drilling is required. Most folks have ear canals that are quite small.

The final goal of this is really to see, to visualize the entire circumference of the annulus, the tympanic annulus, with one position under a microscope so you have this really panoramic view of the annulus. Really, this is necessary to avoid blunting of the anterior angle, which of course would negatively affect hearing outcomes after this kind of surgery.

So again, a very, very important step. It takes some time. Usually we have to be patient. Again, identifying the periosteal side of the glenoid fossa here. We've moved forward here. We fast forward. We can see the bulge of the glenoid fossa.

What I'm doing here is we identified the anterior portion of the annulus, of the tympanic annulus, and we lifted posterior out of the sulcus, the tympanic sulcus. And this is a step that's necessary to secure the new eardrum once it's brought into place anteriorly, again to further decrease the chance for blunting of the anterior angle.

Here, we remove the remainder of the eardrum. So we basically remove the entire eardrum, with the only exception being that anterior crescent-shaped piece. Here in the epitympanic space here, we are careful to remove tissue off the neck of malleus really.

What we can see posterior to that is the long process of the incus and how it articulates with a reticular process of the stapes. This is tissue that sits over the chorda tympani nerve here in the posterior superior aspect of the eardrum. And also we can see nicely now the manubrium of the malleus here in the middle, in the center of our screen here.

So right now, we can see nicely chorda tympani. We usually remove some bone over the scutum just to get a better visualization of the posterior superior mesotympanum. You can see nicely now the neck and the malleus. And, again, all soft tissues are stripped away from the entire manubrium of the malleus or the entire malleus handle.

You can see the ossicular chain is completely intact in this case. Again, removing all squamous elements is absolutely critical, because this would obviously cause a congenital cholesteatoma. Remove all the blood, really making sure this is a very dry and clean field.

Looking up into the epitympanic space here, we're changing the microscope angle. What we can see underneath the malleus is the tensor tympani muscle belly in its bony channel going into the Eustachian tube.

So now, just checking everything, making sure all squamous elements have been removed. We can see nicely also the short process of malleus. It's really pertinent to avoid drilling on that short process of the malleus.

So this is really what we get with drilling. We can see nicely anterior on the edge of the screen. We can see that bulge of the glenoid fossa bulging posteriorly into the surgical field. And again, removing all debris, making sure there's no blood.

We can also see where we suck, where the suction just went into is the Eustachian tube. These are the hypotympanic air cells. We can have a nice really panoramic view of the mesotympanum here.

Now, we are taking our graft, the first graft, the temporalis fascia graft. We're taking it off to the fascia press. The eardrum is usually the size of an index fingernail really, and we cut that tissue. It's completely dry now. Usually under a heating lamp. And we cut that graft to size, remove all the thick tissues from its border, its edge really.

And again, shaping it. And we usually have a piece that's pointed up anteriorly, which is the piece we put into the Eustachian tube where we removed annulus out of the tympanic sulcus.

Now we create a notch for the malleus manubrium. So this is how the new drum will go in there. It is fascia graft. And we remoisturize to graft here in a minute, making sure everything's still dry. Adding some moisture to it. This will make it so we can handle the graft again. And we bring that graft into the ear.

Now, added magnification. Here, again, the graft is still quite stiff, as we can see. We can see the notch for the malleus. Bring that graft in. First thing we usually do is put the graft underneath the malleus handle. It's a very important step. Our biggest fear in these cases is the lateralization of the eardrum.

So we put that graft underneath the malleus, bring it up, pull it all the way up. So now the graft is extra secured and held medially into the middle ear via the malleus handle. And then we rotate the graft to distribute it all across the eardrum and remove some air out of the middle ear. We can see nicely how we move the posterior aspect of the graft over the malleus manubrium.

And the last step really here is to distribute the graft across the entire surface of the eardrum. We can rotate the graft around, making sure there's no blood. And then push the anterior portion of the graft, the pointed part, that we cut into the Eustachian tube lumen, just lateral to the tympanic angle. So secure it there. Again, this is just to distribute it.

Now, we've done this. This is the anterior canal skin that we removed previously. Again, this graft has been kept moist throughout the entire drilling procedures and soft tissue dissection. We place this graft right on the anterior canal wall. Obviously, we've drilled the canal to a new size so not the entire bone of the [INAUDIBLE] will be covered by this graft, but usually that's not a problem if you have a gap in coverage here.

Again, placing that graft medially, securing it, pushing it tightly against that bone, and then bringing in some pressed gelfoams to really secure the graft and the anterior canal skin down. That usually remains then for about eight weeks. We usually typically do not take it out, do not remove [INAUDIBLE] but instead let it dissolve on its own. And we really pack the ear tightly. This is shown here.

Remove some air bubbles from the middle ear. Usually part of a [INAUDIBLE] we packed into our ear canal. Now, we've removed the Penrose train, which held the vascular strip in place. That's our Pavla flap, and medially we have the vascular strip, lay that back into the ear canal, again for added vascularization as well as to add squamous layers ear canal linings. Well, this is really a nice video about the lateral graft tympanoplasty. I hope you enjoyed it.

Video

Lateral Graft Tympanoplasty

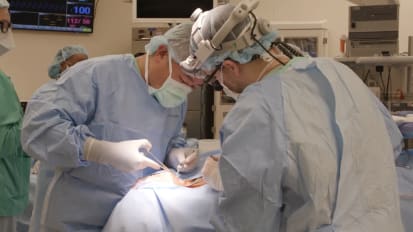
Oliver F. Adunka, MD, FACS, performs a lateral technique tympanoplasty to repair chronic tympanic membrane perforation and improve hearing.

Related Presenters

Oliver Adunka, FACS, MD.

Oliver Adunka, FACS, MD

Otolaryngology
Professor of Otolaryngology

View full profile

ADVERTISEMENT

Related Videos