Live Surgery - Minimally Invasive Ivor Lewis Esophagectomy
Previously Recorded: Thursday October 15th 5:30-6:30PM
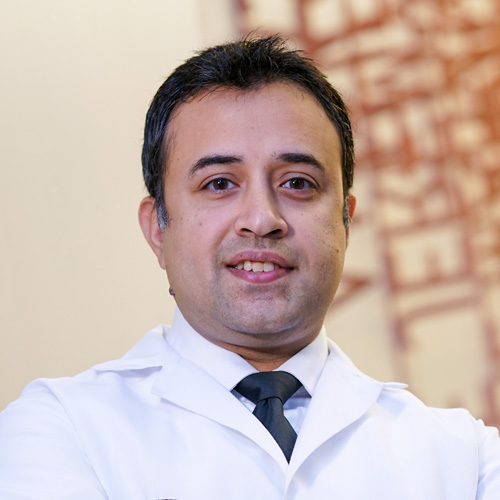
Join Dr. Moshim Kukar, Chair of Surgical Oncology at Roswell Park Comprehensive Cancer Center , for a live surgical webinar featuring a robot-assisted, minimally invasive Ivor Lewis esophagectomy performed for multifocal adenocarcinoma of the distal esophagus and gastroesophageal junction. During this interactive case presentation, Dr. Kukar will provide expert insight into the modern multidisciplinary management of esophageal cancer, including patient selection, comprehensive staging, neoadjuvant treatment strategies, and the role of surgery in achieving durable disease control. Attendees will gain a firsthand look at Roswell Park’s standardized, team-based minimally invasive approach to esophagectomy, designed to deliver outstanding oncologic outcomes while minimizing perioperative morbidity.
Surgeon
Program Director, Complex General Surgical Oncology Fellowship
Chair, Department of Surgical Oncology
Good evening everyone and welcome to today's live surgical webinar. I'm Sarah Abuzar, an endocrine surgeon at Roswell Park Comprehensive Cancer Center. I'll be moderating the Q&A portion of tonight's webinar. I have the pleasure of introducing the surgical video master class on robotic assisted minimally invasive Ivor Lewis esophagectomy. MIE remains one of the most technically demanding operations in for gut and gastrointestinal surgical oncology. Today we have the privilege of reviewing the operation with Doctor Mosham Kukar, chair of the Department of Surgical Oncology at Roswell Park Comprehensive Cancer Center in Buffalo, New York, and program director of the Complex General Surgical Oncology Fellowship, which trains 8 fellows across its 2-year program. Kukar specializes in minimally invasive management of oesophageal, GE, gastric, and pancreatic malignancies. His group has performed more than 750 minimally invasive esophagectomies and have published their experience with 150 consecutive robotic MIEs and more recently more than 300 with exceptional postoperative outcomes and extremely low anastomotic leak rates, around 1%. This is also an excellent opportunity for us to examine the operation step by step. And explore the reasoning behind key technical decisions that can influence both postoperative and oncologic outcomes. As we watch, I encourage everyone to focus on three main themes oncologic principles, technical decision making, and prevention of complications. If you have questions, please submit them via the chat function throughout the webinar and join us for a live Q&A session with Doctor Kucar following the surgical procedure. And see So can we just get a screenshot of this, uh, all right, ready when you are. So our initial port sort of goes between the costal margin and the ASIS, you know, so of course I move things up if it's an obese abdomen, you know, move things down a skinny one, so roughly between these two points, you know. Alright, so the second part is Usually to the left of the midline, so I'm right at the xiphoid, pretty much at the level of the umbilicus right above or below again based on the body habit is, but I think this guy's skinny, so I would come down here. Right next to the umbilicus, yeah. Then we go pretty much at the same distance to the lateral edge of the rectus, which is here watching for our epigastrics. So yeah, come down here, yep, that's a 12. So that's my stapling port here typically. So these 3 are in the straight line and then the 4th 1 is a little bit higher which is the retracting one, yeah. This one is one hand breadth. Superior and you know outwards, yeah, the assist is in between these two ports typically and again watching out for the epigastrics. So the uh Nathanson I place, I don't know what retractor you prefer, but I use the Nathanson, yeah, so it just goes like maybe 1 centimeter below and to the left of the xiphoid here. Hiatal hernia. Yeah, a little hiatal hernia there. OK, so we're ready to dock. This is our setup. Let's clean this up a little bit. It sounds very loud. We'll fix it when we, uh, can I get a dry lab, please, just because I was and we're watching the Nathanson. Yes, we're gonna come out this much. All right, so make sure step one stomach is decompressed. NG Yeah, it looks pretty good. Small gist or something, yeah. So we said we're gonna ignore that liver thing didn't look suspicious, right, sir? OK, so step one we typically grab. Anterior wall of stomach. Lift up on division. Lesser sack we can see here, yep, there we go, thank you. I do not grab anything with the left hand. It's just a push. All right, so we can see the epiploics up here, kind of seeing them from the bottom and from the top. Oh, really splaying it out. The left hand is really going in and pushing up here. A little bit of extra momentum stuck here. Yep, yep, there we go. There's some adhesions here. Yep, colon's not, it's not too far. There we go. So that's our epilos there, a little pucker here, yeah. We're gonna move up, choke up on the stomach here on the vision. So this anatomy is obviously variable in people, but this is where I wanna get to the left gastropoloic. I wanna create a little mental flap. So I think that's the left gastric pedicle, left gastropoloic pedicle. There we go. That's our, that's gonna be our flap here. So it's all nice thin momentum, I think, Maureen, I'm, yeah, fighting you. We're pretty generous with if it's not really bunched up and you know, if it's nice and thin momentum, then I try to take a little bit more. At this point we grabbed the back wall. I exposed it for her. Uh-huh, she grabs it. And then the vision I keep this arm here. Well, you're pulling Uh, hold on. Uh-huh, got it. And I'm just gonna sweep back here, but expose the rest of the back wall. All right, so that's gonna be our flap here you can lift up. This is gonna be part of our flab. Thank you. Let's choke up. Thank you. She already knows, reads my mind, yeah. These are all the short gastrics here. Split them out a little bit. Mhm let me see where my left hand is, yeah. Grabbing this good. Thank you. Uh, relax for a second. Let me just pull with one a little bit more. Yep Mhm So Sarah, the last short gastrics, right, is always safer. It's, it's hard to go from this side, so you wanna expose it, you know, the back wall and just kind of follow this, probably a posterior gastric here, some more short gastrics that you can take, but just kind of hugging the stomach here. Splenic artery is gonna be splenic artery is down here you can see, you know, but it is tortuous, see that. So just kind of make sure you kind of thin this out. Little sucker action, please. So then you know once you find the plane here right on top of the diaphragm you get to just connect the planes to the other side. Yeah, there you go. That's our plane again. Splenic arteries down here, so you're really hugging the stomach. And then you should be able to pop through here and then connect these two. Nice Right, so appreciate the two planes here, right? This is your mental flap which is up here, and these are your short gastrics, right? So we disconnected the flap first and then we tackled the short gastrics and the posterior gastrics. Right, shit. So that completes our greater curvature dissection with a nice pedicle flap that we have. Usually about at this point we can stop. You can do a little bit more, but we'll come back and do it. On the other side OK, good. So keeping that exposure. We're gonna grab the look back wall here. Right, so most of this is kind of sharp cuts. Gastropancreatic folds. Yeah, he's got more than usual. Left gastric pedicle you can see. Right there Uh OK, good. Well, that's, that's what we want. Everything freed up here until we get to the, the left gastric pedicle and you can see the lesser sac here as well. Now the goal is to find the GDA, take all these poster more folds on the, uh, gastropancreatic here. So shares please to us. All right, again, check up with R1. GDA is right there. See you. We still have to do a little bit more, but I'm getting into a deeper hole here, so I'm gonna. Take some of the anterior stuff, yep, back to the sealer, please. All right, so once we have exposed the GDA, taken all the gastropancreatic folds, you see the GDA nicely now, then we switch back to the anterior wall. Grab as distal as we can. Push towards the G junction. Now this plane should have thinned out for us. Mhm. Mhm. Right, so that's, that's our. Pedicle there a little tortuous it can be. You have to be mindful here. This is a little tortuous here. Mhm. So I don't wanna make this curve too soon here, Sarah, right? You see that's till you get to the Pylorus. You wanna be mindful that that can be a little bit tortuous, the GDA. OK, choke up time. That's Pyloris there. Yes, exactly. That's the plan, yep, I got this, yeah. Again, our pedicle is here, should be diving. Want to expose the head of the pancreas and duodenum here. All right, there's Dewey. Nice Uh, no reason to cokerize. Just have to make sure that you get all these. Adhesions off the gallbladder, so the move here is that Maureen's going to grab. Push to the G junction. I'll use my arm one right on the gallbladder. So getting all of this adhesions is extremely important. Nope, I think the key is getting the adhesions off the gallbladder completely. I make sure that all the way up to the porta, so that's bile duct there. So, and then I'll show you posteriorly of the pedicle, getting the colonic mesentery off. OK, good. So that, Exactly, so now you're pushing up, yep, a little bit more, yeah, that's nice mobility there. OK, so now let's get back to the back wall. So this is what limits us here is some more colonic adhesions to the pedicle, you know, you can see this, that that's. That part is important. People obsess about the duodenum. I think this is where the Yeah, there we go. I just get into the right plane here. Yeah, that's your gastropoloic vein getting these adhesions back here. All right, artery is here, vein is here. That's our plan There you go, right on the Dewey, uh-huh. So this guy has a distal tumor, then another focus at 30, right? That was positive, yeah. The So this is what limits our mobility here, just getting all of this off right at the head of the pancreas. There you go, see that head of the pancreas there? So all this I think that should be pretty so once you're up to this pedicle, I think it should be pretty good. We don't want to skeletonize it completely either. One more fight here. All right. Let's come back. My lords should easily reach the G junction. That's my Lord's hair. That's pretty good. You can see any other tension points here. You can see the majority of the tension is right here, right where the pedicle is going in. It's not at the dewy. Yeah All right, that's pretty good. So about 4 centimeters proximal to the pylorus is our right gastric division. So this is about 24. Yeah. It was meant to be Mhm. Right at the edge of the stomach I think is the best plan, yeah. Look for any accessory to replace anatomy. Do we see any off the left gastric? I don't, right? Good. Keep going up. You're gonna be in this direction all the way to the G junction. Good. Once you hit the G junction or, or the right cruise, then you come back. Let's do the left gastric pedicle, arm one. Good tent up up up up good. Yep, this is your pancreas. That's your plane right there, yep. But it's starting to open up good. Mhm. Yeah, you wanna be a little deeper, yeah, you wanna be right here. All this, all this nodal stuff has to come up with you, yep. So you got a transition here, right? We're not doing a formal D2. If you're doing a formal D2, you would take this common category no lift everything, right? You can see your pedicle, so you wanna be more on this plane, not going down in this direction, you know. So this I think we can take that separately. Here So I wanna be deeper down here, right? You see your left gastric pedicle there? Then all of this and we have to get all this tissue up. Take this Suction You see that note needs to come with us. There you go. So, now you're just, this tissue can take at your window right around here. All this is clear stuff and then staple this off right at the origin. All right, so now idle the section. Maureen grabbed the specimen here. Arm one grabs the right cruise. We got a hiatal hernia going on. Now we do our frontoesophageal membrane. Yeah, a little tease with the sealer itself helps you kind of open up planes. That's Yep, yep, cruise fibers there. So I want to reduce this hernia, of course, before we do our conduit. See the opposite cruise there. So now we go in, grab arm one, lift up all of this here. Maureen hands goes in, lifts up this so we can see the spleen. Beautiful, yeah, that's the view we want. I see. That's a hernia sac. We had all of this fed. OK, good. Now hand over hand. Hold the NG back to 30, please. OK, thank you. All right, let's connect this here. Right hernia is reduced. This is it here. Yeah. Just mobilizing to make sure that the hernia is completely reduced, you know. Just a couple of bands here holding us. OK, good. Well, a little bit more hair more in this side. Well, that's all esophagus there. All right, NG's at 30. All right, let's switch the arm, so cardiac goes in 4, bipolar goes in 1. The blue 60s for for the stomach, you know, I, I, I don't know if your preference is green, but I think that works too, but I, I'm switched to blue now. So first one sort of comes in at an angle kind of coming in here. This is Pylora Sears about um about 4 centimeters proximal. This is about 2. Distance and it comes in an angle. And then we're going to follow this curve along here. And I keep the width of the conduit about 5. This one comes in fairly straight in. All right, so now, um. One comes into the picture. Grabs it and. I think to me Darryl this is one of the, the, you know, at least the early on learning curve mistake is where this you gotta really straighten this conduit out and kind of pull it into your, into your field a bit because otherwise if it's all kind of bunched up here then the staple line can rotate, you know, so what I do is I really grab this and pull everything into the camera a little bit and then just make sure that it's completely flat and straight, you know, so you have a good sense. You know, where, where you want to go if it gets bunched up, um, I'll show you, I think, because there's always more stomach up there you'll see that. It, it's easy to make that mistake. And again keeping this With fairly consistent So this is where again I choke up on one. And really pull it down so it's not bunching up so you like you've really got to bring this out here. There's a lot more stomach than you think up there. This is number 5. But I think our anastomosa is probably going to be at this level we'll be able to excise still excise some of this, you know. ICG in please. You agree, Sarah, it's probably up till here. Yeah, I mean, I think there's some green pasta, but Yeah. Maybe up till about here we got excise, you know. All right, so a couple of things I do here. I, I prepare the back wall for the anastomosis in the, in the belly. Uh, so I, you know, get rid of this couple of these branches here, short gastrics, as you know, there's no flow in them, but the omentum is tethering it, so the the anastomosis, I would hope to have it probably at this level here, you know, so I want to make sure I get this omentum off so it's not really catching in. Uh, on the back wall you can see the transition almost to here, you know. So we got to be careful in the chest. I think this is going to be 2 flips, guys, OK. Well, I'm, I'm just not, I want to make sure that we're we're really happy with the anastomosis here, otherwise I'll come back and do a J tube, you know. All right, let's, let's give it a little bit more time. What's our flap like here? So this is all our flap here that's gonna go around the anastomosis, nice and thin. All right, sir, immobilize the esophagus a little bit more. Get a Penrose, please. Uh-huh, more spread, spread, uh-huh. Um-hum, right up against the pericardium, yep. Yeah, pull the specimen all the way to the patient's right. Use arm one. You're gonna want to get into the left chest area. Go, go underneath, uh, underneath her hand, yeah. Yep One bite, yep, take that vessel anteriorly. Couple more spreads, spread, spread. You can see the edge of the pleuris right there. See that whitish, yeah. All right, so we can do this from the chest, yeah. So come back, nothing posteriorly, get your penrose around and leave it up there. So choke up on this, make sure you pull down on the specimen. Your past Uh-huh, hold on. Mhm, yep, tightened there. Good. 20. I I So this is pretty consistent too. We marked the tip of the scapula, which they did. I think this is perfect here. So I typically go about either in the 8th or the 9th intercostal space, so that's 1110, this is 9, perfect. Well, I think we can go in the mind space here. And the first part is between the, this line between the scapula to the spine here. So, some, somewhere in the middle, not too posterior, and then you want to be able to squeeze in one. Um-hum. And then two more ports here, and then our extraction is a little bit anterior. Where's your staple port? So, this would be the staple port here, which is. Yeah. Pretty much in line with the scapula, so it comes in straight, you know. Got you. So, that's fine back here. Thank you. That's a good space to be in here. Knife, please. Pulling up, yeah, yeah. So I, I do, I do tilt the table a little bit away from me so you should get the lung out of the way a little. All right. Yeah. Good, you see our Penrose there? Is there an adhesion? That's the inferior palm ligament. I don't think we need it. Yeah, you can just, just come in and do this. Push the MG to about 50, please. Good. So I preserved these pleural flaps. This is what we're going to close after. Unless the tumor is, you know, Invading into the flora. When you're doing this part, uh, just making sure I get the pleura off the esophagus completely, you know, and not just excising a bunch of the pleura, just opening it up the middle. There is a big bronchiolar here. Well, a stapler please. Yeah, don't lean on the airway, yeah. Good, so come back down, grab the Penrose, yep. So you can tell there's some scarring right here, right? That's probably the site of the tumor, right in this area here. Uh-huh, lift up with the left hand, yep, good. OK, right on the pericardium. Start to open up this, get the pleura off completely. Yeah, so Maureen can come, she can come and grab this pleura here. That's it. And then you can just get right on the pericardium here. There we go. That's pericardium there. You want to get all of this tissue into your specimen. Yeah, so this would be your um. Inferior palvic ligament here, right here, so anything in this area would be station 9. This is kind of AL right on the pericardium. And then we're going up into 7 here coming up, which is in this area, subcarinal. This is all subcarinal that I take separately. So I kind of leave this while we're waiting on frozen then I dissect this out. All right, let's lift on the other side. Advance the penrose a little bit. When there's a big hiatal hernia, you don't want to pull too hard because the specimen comes flying into the chest then and then, which is already happening here. So, this is where I think when we're, when I'm approaching it from the other side, I keep the esophagus more in the 12 to 6. I find it when I'm working on this side, you know, I try to turn my horizon so it's more like a 9 to 3, that I'm not really fighting the spine, you know, I'm just kind of going parallel here to, to the spine, so it works for me. This side we clip up a little bit, thoracic duct branches, yeah, right there. I think we can identify the thoracic duct in most cases. So you want to get all of this stuff all the way to the other pleura. That's the edge of the pleura, yep. Grab the pleura right there is thoracic doxia. So if we don't want to be in that territory, that's where you hug better. Esophagus a little bit here, so we're getting close to the airway now, so I try to find the airway from the of the screen right side, so that's your subcarranial packet here, just follow that, that'll take you to the left main stem. Right there is the left mainstem. You can see the balloon. We're gonna come back and clean up the subgroinal. So once you see your main stem, then you can. Flip back to the other side, grab this Maureen. So this is thoracic duct territory. This is your nodes of interest here. And now we just kind of do this in layers. So I mean I see the airway here, so I just kind of do this in layers. Bentley grab stabilize, get it off the airway. More spreads. So for my typical anastomosis for a G junction, I usually staple right at the level of the azagous. Um I think that and and you have to mobilize maybe about 2 to 3 centimeters above the asygus just to get the site to site anastomosis. Of course you can go high mediastinum if there's a concern, but usually for a G junction that's plenty of margin and sets up the anastomosis nicely. All right, let's. Pretty good about the Azagus there. Pull the engine back please to about 25 please here. So this one, Darryl, it, it has to, the angle sort of comes in. It's hard to do this. Almost 90. It's going to be a little bit tangential. I come from underneath and, uh, catch up, you know, you can see how much you have mobilized and, I mean, obviously it retracts, as you know, the esophagus. Yeah, so right at the level of the Isaac is probably here. That should be about 25. 0, NG, can you wiggle it, make sure it's free. So this is one of the critical critical parts where we're pulling up the conduit to make sure it's not twisted and it's not redundant. So we work together. Uh-huh. So if it's coming up right, you should be staring at the poster wall of the conduit which we are that's where we're clearing up in the in the belly good a little bit of yep, that's it. Yep, you can leave it there. Let's get the specimen. Looks better, huh? Mhm. So that's your subcarranial packet here. Yeah. Mhm, spread a little bit. It's a full thickness by sort of around the 11 o'clock. Uh, just basically making sure that I got the mucosa. I have made some mucosa tunnel with the stapler here, so this just allows me to make sure I have full thickness and you know I got the mucosa here. Generally the mucosa retracts. I mean, especially if it's a thicker esophagus, so. It's not Not that hard to make a sound because of the tunnel, you know. All right, so we're going to watch for the staple line. It's going to stay away from the spine. Mhm grab right here. More impulse up gently. I make sure that we're not twisting here. Mhm mhm. Should come upstate, stop there for a second, yep, yep. Keep going a little bit more stop. OK, so stop there. That's where it rotates, you know? Uh-huh. Let me just make sure, yeah, so there isn't much, much to pull here. And the staple line is straight. Straight, good, good, good. You're at the apex, beautiful. Let's get this Uh-huh. Mhm, I think we'll be able to excise a fair bit of the distal conduit. Or the apex of the conduit here. Give it a nice stretch. Mhm. Yeah, 60 blue, please. So here Maureen just keeps that gentle stretch up towards the apex without twisting and I'm looking at the back wall. And I just come in basically, you know, flat here. But I usually grab the staple line here. Advance this. That's 6 centimeters making sure that we're not catching any momentum we kind of pushed down. That's a 60 staple. That's a 60 staple load, yep. Wiggleeni please. Good, thank you. Let me just grab that NG and just guide it a little bit here, yeah, all right, advance it now there you go. Uh-huh. So just lining up sutures to excise this, so I do esophagus to esophagus here. Because, uh Yeah, just 8 sutures exactly. I put like 4 or 5 sutures and I just excise this and. The 3rd suture goes from the stomach to the esophagus. So this is stomach to stomach. Mhm. I mean we can comment you can you can sew this too if you want you can do a V lock or something, you know, but just a little nicer with the cleaner with a stapler. And you can freshen up the edges of the esophageal site that we've been pulling on. All right, blue 60, please. So this is done in two. I go with the blue on the stomach up till about this intersection of the staple line and then I excise this as. A little bit of the esophageal staple line, so it maybe narrows it by like 1 centimeter, you know. But it's still bigger than any ENastomoses out there. I think we'll be able to excise till about here. Which is where we wanted. So I just put some reinforcing sutures. I don't know. Helps her do that open as well and. And then one sort of at the apex. Careful, don't pull too hard. Where's the apex of the anastomosis is here. And that's why I clean all of this, right? So now I can just excise it here, which is below our mark here that we made. You run a scope down at the end and take a look at it? I typically don't these days. I mean, if I'm happy with the. This looks pretty well vascularized still here, you know. I agree. Let's dunk this guy. And then the media stylizing part is here which, which I like is this is where it kind of bulges out over a period of time in the chest so grabbing this portion of the pleura, you know, which is sort of like a zipper closer closer up till here, you know. Uh, show me, show me the floor on this side, suction please. So we just take a VLOC and kind of run. Those two essentially here, you know. And it really kind of media stylizes this nicely. All right, let's go. Let's get some sutures here. Well, it basically what it's doing is what happens with Albert Lewis is that your, your condoor is sitting a little bit, yeah, exactly, it does this, and then over time it just bellows out and then it just becomes like redundant here. Exactly. So when you're media stylize it, you're pushing it down into the media style like really centralizing, you know, energy emptying is much better, reflux less reflux for these people, you know. So we're now I think close to about 110 with these that we're writing it up and submit, we're submitting that, you know, Faisal presented about 60-65 data. You know, it's interesting because initially Steve and I were doing neck anastomosis and it doesn't happen much in the neck anastomosis because think about it, you're pulling in the left neck so you immediate stylize it a little bit better when we switched to Ira Lewis is when we started seeing these dilated conduits and it was like nobody was writing about it and like why is it happening? We were going back in the belly we were tacking it and it's just like one of those light bulb moment be like. You know, let's try to do a few of these and see what happens and then when I saw the post op scans for these people, I'm like, wow, you know. Yeah, see if you can grab that momentum, push that down and. Yeah. There you go. So I just wanna make sure there's no redundant stomach here, OK, yeah, most of the herniations, as you know, are here or posterior. I haven't seen a herniation on the other side. Alex No Doctor Cucar, thank you so much for joining us today and for sharing your expertise. We really look forward to learning not just what you do, but why you do it and what alternatives to consider. What have you learned throughout your experience. Great, thank you. Uh, I, I do wanna give a shout out to a few people, uh, obviously our awesome creative services team here, Peter and Xavier, thank you. You always put up a great show. Uh, thank you, Sarah, for moderating this session. You know, did an excellent job. Thank you for making us look good. Uh, special shout out to Doctor CV Caleb Sey is our second-year fellow, uh, who did the majority of the editing work here and did an exceptional job with that. So thank you, Caleb. Uh, and then of course to our, uh, phenomenal team that, uh, the surgical team that help us do what we do. So thank you. And, uh, Doctor Kukar, before we begin, could you tell us a little bit about your robotic esophagectomy program here at Roswell Park and how it matured over the years and. What makes this program so successful? Without trying to age myself too much, I think I've spent about two decades, uh, just kind of focusing on this procedure. When I did my residency training, we used to do this with open incisions. Then we, in my fellowship, uh, my mentor Steve Hawkwell, we started doing these laparoscopically, uh, and then we switched to robotics probably about 2016, 2017, and this is where. Uh, at least I've seen the best outcomes in, in our hands, uh, now close to over about 300 robotic esophagectomies, you know, with, uh, you know, minimal sort of, uh, uh, perio complication rates. Uh, so yeah, I mean, I think it was a transition to open to laparoscopic to robotics. Uh, the robotics part was, you know, we started off as, as a hybrid initially, did a bunch of belly cases, uh, robotic, then some chest robotic, and then kind of put them together to be able to get to where we are. I think the transition can be fairly, uh, made easily with open to robotics or laparoscopic to robotics, and we've published some of our work with that. Uh, but yeah, I mean, you know, now our, you know, default is for these G junction cancers is a is a robotic Iver Lewis esophagectomy. Yeah. That's awesome, and, and, you know, you've published so much on this in the last, uh, many years now, and, you know, your group did publish about the 6 centimeter linear staple cytocytomastomosis. Can you tell us a bit about the principle of technical and clinical consideration to favoring this configuration? And its benefit over the circular staple technique. Yeah, absolutely, I think, I think that has been our favorite, uh, sort of anastomosis even when we were doing this laparoscopic or. Are a few open early on, uh, I think us as GI surgeons, surgical oncologists, uh, you know, this is how we create anastomosis in the belly for any of these, uh, liminal organs, uh, and I think that has been our preferred approach, uh, and even if you look at the national data for some of the high volume centers that have compared open versus, uh, sorry, uh, site to site staple versus EEA. Uh, the staple anastomosis, uh, usually has the lowest leak rate, uh, but I think as, as we are sometimes kind of victims of our training and if you see a certain way. You kind of stick to it, but, uh, some people prefer EEAs just because they've done that in the training, but, uh, it's a pretty high stricture rate with that anastomosis, as you know, and certainly a higher leak rate as well. And you know, uh, we have a question here from our audience. We saw in the video that you used ICG to assess the anastomosis and assess perfusion. Do you ever use spy to assess for vascularity and, and the perfusion of the anastomosis as well? Absolutely, yeah, I think if you saw in the video we actually did ICG. To assess the perfusion of the conduit, I think, uh, visual is pretty good too. Uh, ICGs just kind of, kind of reinforces what you're looking at, uh, and I think this is where it's important that we can tailor the approach to what the needs of the patients are. So there have been times where, you know, the apex of the conduit is not very well perfused. We can change our anastomotic technique to do either do an EA anastomosis at that time because you, you, you don't need a lot of, uh, you know, for. Side to side staple you need more, more stomach to be able to do that or you can even do a hand sewn uh anastomosis so you can actually excise the kind of the less perfuse part of the stomach there. So absolutely I think that's, that's critical. So you always have different options and alternatives that yes you prefer the linear um stapled anastomosis, but you know if the perfusion is marginal or there's any concern, you still have that in your bag to use a circular staple or the EEA stapler. Yeah, yeah, I think a handful of times I think it has been helpful, uh, especially, you know, there have been cases where you're doing this after a patient has had a splenectomy or the patient had a previous, uh, hiatal hernia in essence fundoplication that a lot of the stomach, or at least the top half of half of the stomach is, is not a usable conduit, so you can excise a lot of that and you can do a lower anastomosis utilizing an EEA technique or even a hand sewn anastomosis. Uh, I think one of the key things, at least for our program, is that, you know, it's not one size fits all. This is how I was trained to do it, you know, we're able to tailor the, uh, the technique to the needs of the patient. So, uh, in combination with our thoracic colleagues with the, the approach we offer all kinds of approaches. Some patients need an. Anastomosis with neck dissections, you know, whether you need an Ivor Lewis, a handful of cases where they had really bad lungs and you don't want to go into the chest. We've done some transhiatals, but again, majority of the cases for G junction cancers, you know, Ivor Lewis esophagectomy seems to have the best functional and oncologic and uh. Perioperative short term perioperative outcomes we can see the outcomes are pretty fantastic and um when do you decide, we hear a lot of patients asking about, will I have a feeding genostomy or not. When do you decide do all patients get feeding genostomy or is it more selective? Yeah, uh, interestingly, over the last I would say 60 cases or so, uh, we are not routinely. Placing a feeding judge annostomy tube, I do place it for neck anastomosis just because they tend to have a little bit more of silent aspiration and swallowing issues. So we, we have it for those, uh, for Ir Lewis, I do it very selectively again, mostly patient factors, you know, if they're a little bit malnourished going into surgery, especially ones that are really lower BMI, they don't have, they can't lose much weight. Actually one of our fellows put. This together to present at the SSO for this year where we did a propensity match analysis and and for the ones out of the 5058 cases I think we only had one patient that required placement of a feeding jeinostomy postoperatively. Uh, it's slightly higher weight loss, about I think the mean was about 1.5 kg over 30 days and about 3 kg over 90 days. But you know there was no difference in any other, any other outcomes, you know, so I think it's, I think it's safe to omit, uh, in the majority of the patients. And you can imagine how it can affect, you know, there's a lot of things that can affect the quality of life for these patients and still an important metric, um, to look at not just postoperative complications and leak rate in these patients. Yeah, absolutely, I think we're fortunate with, with our series at this point that leaks and mortality is, is less of an issue, and I hope I don't jinx jinx myself, but uh. Uh, but I think it's, it's equally important now with chemo immunotherapy seeing fantastic responses. Patients are living longer, that functional outcomes and the emptying of the conduit is, is critical. So over the years we made a lot of modifications and some of that is what, what you saw is really being very careful. With how you construct the conduit, how much do you pull the conduit into the chest, avoiding any, uh, malalignment, whether it's axial or rotational or redundancy of the conduit, uh, and then one thing that we, we do, we do routinely now is what is called the media stylization of the conduit where we close the pleura over it. I highly, highly recommend that people should have this part of the practice. Uh, because we're not doing chemo radiotherapy any these days, so the pleura can be preserved in majority of these patients. Now, of course, if it's a T4 disease, you'll take the pleura, but majority of the patients you can preserve it, and it really mediastinalizes the conduit, uh, and the emptying of the conduit is much better. I think we blame the pylorus and the vagus a lot more than we should. I think it's usually the layout of the conduit and how it lays around the hiatus. And that's why we also do this double flip as needed, uh, because you can go back in the belly and you can see how the conduit is laying around the hiatus, uh, and you can always open up the hiatus and, and do some tips and tricks to make sure that that emptying, you know, that's a straight shot of emptying around the hiatus as well. One of the audience to add to that, um, question is how does Roswell Park work to limit complications during and post procedure for our esophagectomy patients? I think what I saw with the, uh, I think we were doing a pretty good job with even laparoscopic, we published leak rate about, you know, 6-7%, which was pretty contemporary as you know, internationally, uh, these can vary anywhere from like 8 to 30%. Uh, but, uh, I think what I saw when we moved to robotics is that we were getting sort of very consistent outcome every single time, you know, the way we were placing sutures, uh, and, and also our ability to be able to replicate this and teach trainees, you know, uh, laparoscopic surgery, as you know, especially with these complex procedures, was sometimes a little bit of a challenge, and I think it's a little bit easier to be able to do that. So I think just having a, a consistent approach to this, break it down into steps, you know, kind of follow those. Steps every single time and having a consistent outcome I think is what leads to maybe some of the good outcomes that we see here. And last question, looking ahead, where do you see this field evolving into and what do you think will have the greatest impact on oesophageal cancer surgery? Yeah, I mean, I think it's an exciting field in general for G junction and gastric cancers. You know, we have a lot of biomarker driven targeted therapies, immunotherapies, and I think how Sequence therapies is gonna be uh critical uh based on the Matterhorn data. I think we're doing chemo immunotherapy for all of these patients, but I think there was definitely a benefit for radiation, uh, uh, in a, in a, in a subset of patients, right? So now we have an active trial where we're actually doing a short course SBRT to certainly get some prime immune immune priming effects of radiation and then also get some palliative effects because most of these patients are symptomatic when they're swallowing. And after they get a short course of SPRT, they go on to get then chemo immunotherapy, and then potentially surgery. So I think just utilizing a lot of these uh targeted and immune-based therapies in the peri-op setting and how to sequence them will be, will be exciting. That is very exciting news and we really look forward to it in the future. Um, Doctor Kukar, thank you again for taking the time and to share your this operation and share your expertise behind your decision making and your, um, and your technical, uh, skills. Um, your group's work really, really highlights how continuous surgical, uh, innovation. As well as, you know, rigorous evaluation of outcomes and education has really advanced the care for patients with esophageal and gastroesophageal junction tumors. Thank you again for sharing your expertise and thank you to everyone for joining this today's surgical master class. We really hope that, uh, you know, uh, this discussion has provided practical. Insight that you can take with you to your own practices and if you would like to connect with Roswell Park possibly to refer a patient or learn more about these complex G junction tumors, uh, please visit physicianresources. RoswellPark.org and click on the refer a patient button or call 1-800-Roswell.